Introduction
Composting is a fantastic way to reduce waste and create nutrient-rich soil for your garden. Composter machines have made the composting process easier and more efficient than ever. However, like any other appliance, these machines require regular maintenance to ensure they continue working smoothly. In this comprehensive guide, we’ll explore Composter Machine Maintenance 101, providing you with the knowledge and tips needed to keep your green machine in top-notch condition.
1. Safety First: Preparing for Maintenance
Before diving into maintenance tasks, it’s crucial to prioritise safety. Here are some safety precautions to keep in mind:
Disconnect the power: Always unplug or turn off the power source to your composter machine before starting any maintenance.
Protective gear: Wear appropriate safety gear, including gloves and safety glasses, to protect yourself from potential hazards.
Read the manual: Familiarise yourself with the manufacturer’s maintenance instructions and recommendations provided in the user manual.
Tools: Gather the necessary tools, including screwdrivers, wrenches, and cleaning supplies, before you begin.
Now that we’ve covered safety, let’s move on to the first step in keeping your composter machine running smoothly: cleaning.
2. Cleaning Your Composter Machine
A clean organic waste converter machine not only functions better but also helps prevent odours and pests. Here’s how to clean different parts of your machine:
Cleaning the Composting Chamber
Empty the chamber: Start by emptying any compost that’s ready for use. This will give you better access to all areas inside the chamber.
Wash with water: Spray down the interior of the chamber with a hose or a pressure washer to remove remaining debris. Make sure the machine is unplugged and turned off during this process.
Cleaning the Blades
Remove the blades: Follow the manufacturer’s instructions for safely removing the blades. Typically, this involves unscrewing or releasing a locking mechanism.
Clean the blades: Use a brush or scrubbing tool to clean the blades thoroughly, removing any compost residue. Be cautious when handling sharp blades.
Inspect for damage: While the blades are removed, inspect them for any signs of damage or wear. Replace any damaged blades according to the manufacturer’s recommendations.
By following these cleaning steps, you’ll ensure that your composter machine is free from debris, which can improve its efficiency and longevity.
3. Regular Inspection and Lubrication
Regular inspections are crucial to catch and address issues early. Here’s how to inspect your composter machine:
Check moving parts: Inspect the blades, motors, and any other moving parts for signs of damage or excessive wear. Tighten any loose screws or bolts.
Electrical components: Ensure that all electrical components, including wiring and connectors, are in good condition. Look for any exposed wires or fraying.
Sensors and controls: Test the sensors and controls to make sure they are functioning correctly. Refer to the user manual for specific testing procedures.
4. Troubleshooting Common Issues
Despite your best efforts, you may encounter common issues with your composting machine. Here are some troubleshooting tips for common problems:
- Clogs
Stop the machine immediately. Unplug it and allow it to cool if necessary.Carefully open the chamber and remove the blockage, wearing gloves to protect your hands.
- Electrical Problems
Check the power source and ensure it’s functioning.Inspect the power cord for damage.If you’re not comfortable with electrical work, contact a qualified technician for repairs.
- Slow Composting
Ensure the compost mix has the right balance of green (nitrogen-rich) and brown (carbon-rich) materials. Maintain proper aeration and ensure that the compost is not too wet or dry.
- Excessive Noise
Stop the machine immediately and unplug it. Check for any foreign objects or debris in the composting chamber or blades. Inspect moving parts for damage or wear.
Remember that safety is paramount when troubleshooting any issues with your composter machine. If you’re unsure about how to address a problem or if it requires professional assistance, don’t hesitate to seek help.
5. Maintaining Electrical Components
Composter machines often contain various electrical components that need maintenance and care. Here are some tips to keep these components in good working condition:
Check the wiring: Regularly inspect the wiring and connectors for signs of wear, damage, or corrosion. Replace any damaged wiring promptly.
Clean sensors: If your composter machine has sensors, clean them periodically to ensure accurate readings. Follow the manufacturer’s instructions for sensor cleaning.
Monitor control panels: Keep an eye on the control panel for any error messages or unusual behavior. Refer to the user manual for guidance on interpreting these messages.
Store electrical components properly: If you need to store your composter machine for an extended period, disconnect and store electrical components in a dry, cool place to prevent damage.
By maintaining the electrical components of your composter machine, you can ensure that it continues to operate efficiently and safely.
6. Balancing the Composting Mix
A well-balanced composting mix is essential for efficient composting. Here’s how to monitor and adjust your compost mix:
Monitor moisture levels: Your compost should have the consistency of a damp sponge. If it’s too wet, add more brown materials like dry leaves or newspaper. If it’s too dry, add water sparingly.
Aerate regularly: Proper aeration helps maintain the right mix by preventing materials from becoming too compacted. Follow your composter machine’s recommended aeration schedule.
Avoid overloading: Don’t overload your waste composter machine with large quantities of materials at once. Gradually add materials to allow for proper mixing and decomposition.
Balancing your compost mix ensures that the microorganisms responsible for decomposition have the right conditions to thrive, leading to faster composting and better results.
7. Long-Term Maintenance and Storage
If you plan to store your composter machine during the offseason or for an extended period, proper long-term maintenance and storage are essential:
Clean and dry: Clean all parts of the machine, including the blades and exterior, as outlined in the cleaning section. Allow it to air dry completely.
Store in a dry place: Find a cool, dry place to store your composter machine. If possible, cover it with a protective tarp or cloth to prevent dust and debris buildup.
Check electrical components: Inspect the power cord and electrical components for damage before storing. Repair or replace any damaged parts.
By following these long-term maintenance and storage practices, you’ll be able to store your composter machine safely and extend its lifespan.
8. Conclusion: A Greener, Healthier Garden Awaits
By following the maintenance tips and practices outlined in this guide, you’ll ensure that your composter machine remains in top-notch condition, enabling you to transform kitchen scraps and yard waste into valuable compost for your garden. A well-maintained composter machine not only saves you money but also contributes to a greener and more sustainable lifestyle.
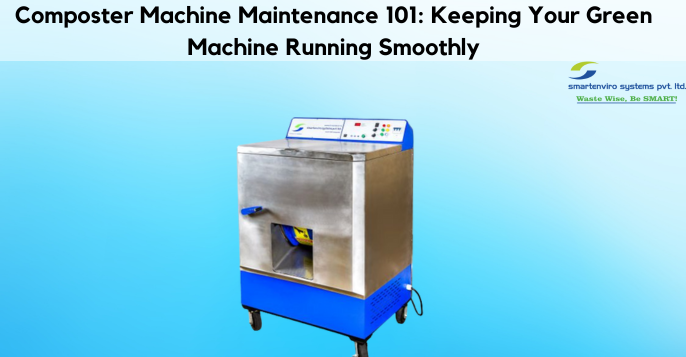
In this guide, we’ve covered Composter Machine Maintenance 101, providing you with a comprehensive overview of how to keep your composter machine running smoothly. Smart Batch Composter is one such composter that includes built in safety! Due to this maintenance becomes all the more easy. Its other features include a control panel with pre-set batch time, and composting cycle of 10-12 days.
Remember that proper maintenance not only extends the lifespan of your machine but also enhances the quality of the compost you produce, benefiting both your garden and the environment. Happy composting!